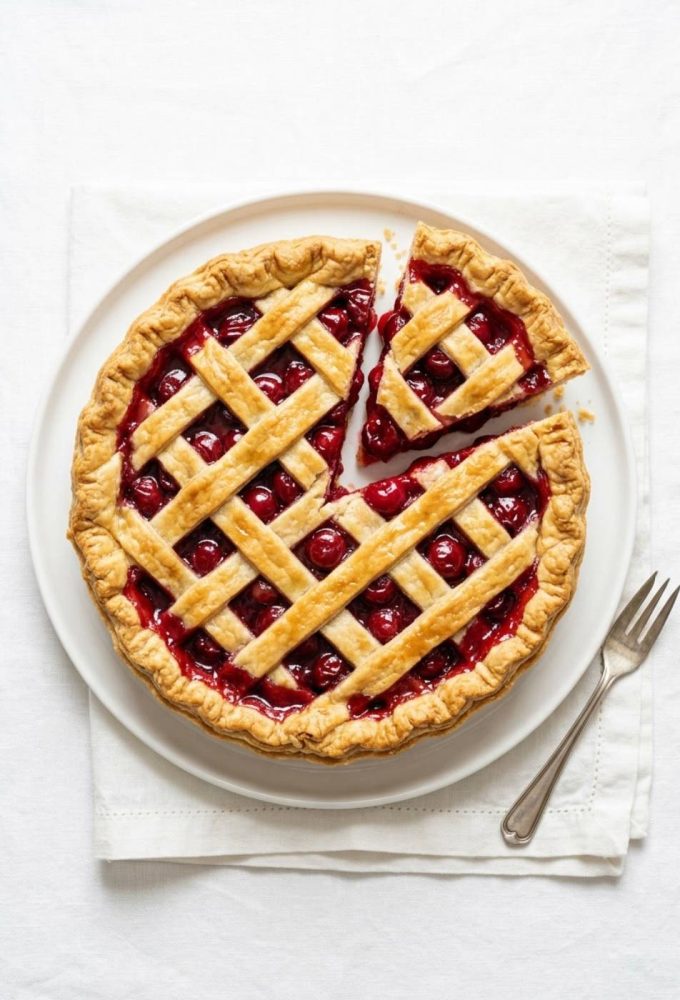
s, and a spoonful of filling makes everyone quiet in the kitchen.
This recipe offers easy steps to achieve that moment. Just follow the instructions to get a flaky crust and a shiny, perfect cherry pie filling. It’s perfect for busy weeknights, weekend baking, or holiday desserts.
It’s been tested with fresh Bing and Rainier cherries and even frozen pitted cherries. You can use cornstarch or tapioca as the thickener. This makes it a reliable recipe for both beginners and experienced bakers.
You’ll find a short ingredient list, smart shopping tips, step-by-step instructions, troubleshooting notes, and a printable recipe card. The tone is warm and encouraging, making it easy for anyone to make a homemade cherry pie tonight.
My Story Behind This Recipe
One July afternoon, the kitchen was filled with the sweet scent of sugar and summer. Tiny hands stained with juice reached for fallen cherries. A fan hummed above the stove as the kids waited for the pie.
The kids had plain chicken at the table, but they were excited for the pie. The filling bubbled, and the homemade pie crust took shape on the counter.
That first time, the pie was meant to be simple. Fresh cherries came from the farmer’s market at Union Square. The house is filled with a warm, fruity perfume.
Friends lingered on the porch, enjoying the evening. Someone started a midnight fridge raid for extra cherries. Laughter echoed through the hall.
Not everything went smoothly. The first batch had a soggy bottom. Rushing to bake without chilling the dough taught a hard lesson.
From that flop came changes. Chill the dough, keep butter cold, and blind-bake the crust just enough. These tweaks fixed the problem and made the homemade cherry pie a reliable finish to summer dinners.
Now, this pie is a comfort that gathers people. It is the one dessert neighbors ask for at potlucks and the one requested on the Fourth of July. The recipe is simple, forgiving, and warm.
It is a little messy, a little humble, and just right for making new memories over a slice of fresh cherry pie.
Why You'll Love This Recipe
This easy intro shows why this cherry pie recipe is a favorite. It’s like getting tips from a friend, not a cooking lecture.
- Simple steps even beginners can follow
- Flaky, buttery homemade pie crust (no store-bought shortcuts required)
- Bright, tangy-sweet cherry filling from fresh or frozen cherries
- Versatile: serves 6–8, freezes well, and works for holidays or weeknight dessert
- Uses pantry staples like sugar, cornstarch, and lemon with easy swaps
- Quick to assemble; active time under an hour
- Comforting flavor that pleases kids and adults alike
- Easy to scale up or down for any crowd
What follows is a short background to ground this tasty recipe.
What is homemade cherry pie?
Cherry pie is a classic American dessert. It’s made with seasonal fruit. Bakers often use sour Morello cherries for a tart taste. Sweet Bing cherries are better for a milder filling.
At backyard barbecues and Fourth of July tables, cherry pie is a summer symbol. Families share tips for a glossy, slightly thickened filling. They add a hint of lemon and vanilla.
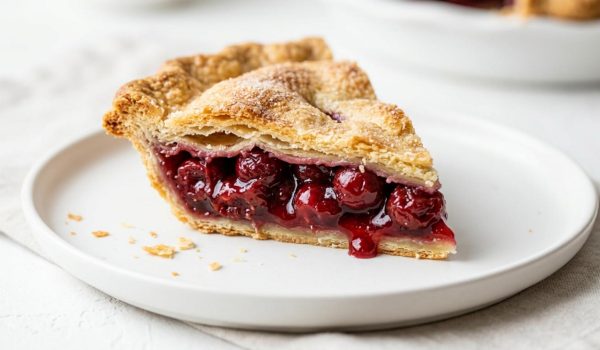
This version aims to be the best cherry pie. It focuses on reliable steps and honest flavor. The charm is the flaky crust and glossy fruit center. People love it because it tastes like warm memories and simple good cooking.
Everything You Need to Make This Recipe
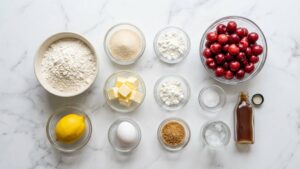
This list names every ingredient and explains what each one does. It gives simple swaps so busy cooks can gather items with confidence before starting an easy cherry pie recipe.
What Each Ingredient Actually Does
- All-purpose flour: builds structure for the homemade pie crust so it holds filling without being tough
- Cold unsalted butter: creates flaky layers and rich flavor in the crust when small chunks stay cold until baking
- Salt: balances sweetness and brings out the butter and cherry notes
- Sugar: sweetens the filling; use granulated sugar or mix with brown sugar for more depth in a cherry pie filling recipe
- Cherries (fresh pitted or frozen): provide the main flavor and texture; they define the pie as a true cherry dessert
- Cornstarch or tapioca starch: thickens the filling so it sets and stays glossy when sliced
- Lemon juice/zest: brightens the fruit and cuts through sweetness for a fresher bite
- Vanilla extract: rounds and deepens the overall flavor profile
- Egg wash (egg + water or milk): gives the crust a golden, appetizing finish
- Coarse sugar for sprinkling: adds crunch and a pretty sparkle to the top crust
Don't Have It? Here's What to Use Instead
- Butter alternatives: use half butter and half vegetable shortening for a sturdier, less fragile homemade pie crust
- Gluten-free flour blends: swap in a labeled blend for a gluten-free crust; expect different hydration and rest times
- Frozen pitted cherries: perfect out of season; thaw and drain to avoid a watery filling in your cherry pie filling recipe
- Arrowroot or potato starch: replace cornstarch with slightly less arrowroot for similar thickening power and a clear finish
- Honey or maple syrup: use as a partial sugar substitute; cut other liquids slightly to keep the filling consistency right for this easy cherry pie recipe
How to Shop for This Recipe Like a Pro
Shopping smart makes baking easier and improves results. A quick plan and the right items save time and money. This helps make a homemade cherry pie the best it can be.
How to pick the perfect cherries
Choose firm, glossy cherries with stems. Bing cherries offer a sweet taste. Morello or sour cherries add a tangy flavor.
Check their smell. Fresh cherries should smell fruity. Avoid soft or bruised cherries. Only buy slightly overripe if baking the same day.
- Frozen option: choose unsweetened, pitted packs from brands like Wyman’s for convenience
- When in season, pick extra and freeze for winter pies
How to spot a good second ingredient
Butter is key. Use unsalted European-style butter like Kerrygold for a richer taste. Add salt to taste.
Flour should be consistent. Use King Arthur or Bob’s Red Mill all-purpose flour for structure. Check cornstarch brands like Argo for thickening and note the expiration date.
- Sugar: granulated for filling, coarse sugar for a crunchy top
- Vanilla and lemon: small extras that lift the whole pie
The Smartest Way to Shop for This Dish
Shop early in the morning for the best produce. Buy cherries in season and freeze extras. Frozen or canned cherries work when fresh are not available.
Make a grocery list by fridge, frozen, and pantry. This speeds up shopping and reduces impulse buys. Plan for a backup ingredient to stay flexible and budget-friendly.
- Check the calendar: buy fresh cherries in late spring and early summer
- Pick trusted brands for frozen fruit and pantry staples
- Use a simple list to shop fast and make a delicious homemade cherry pie or a fresh cherry pie that rivals the best cherry pie from the bakery
5 Simple Steps for Perfect Homemade Cherry Pie
Quick overview for busy bakers. Follow these five steps to finish an easy cherry pie recipe with confidence.
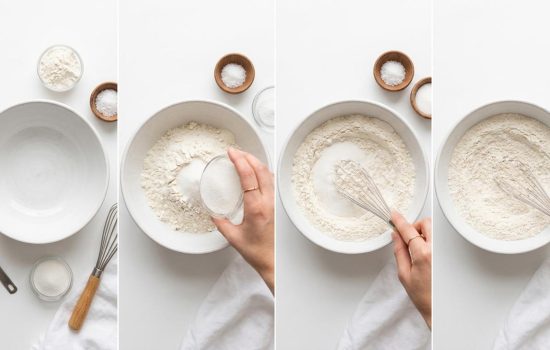
Mixing dry ingredients
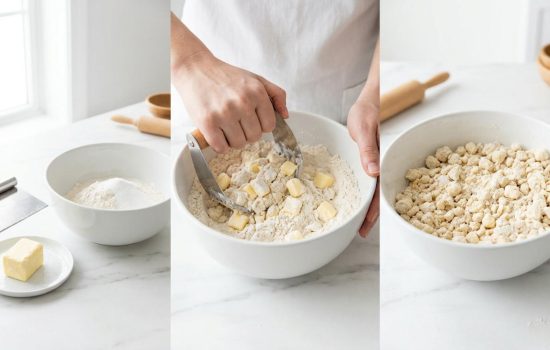
Make and chill the dough. Active: 15 minutes. Chill: 1 hour.
Cutting in butter
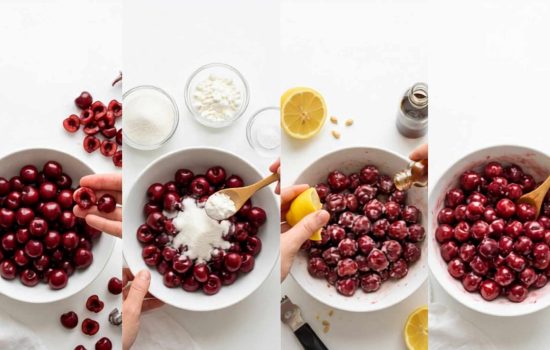
Prepare the cherry filling: pit cherries, mix with sugar and a thickener. Active: 10–15 minutes.
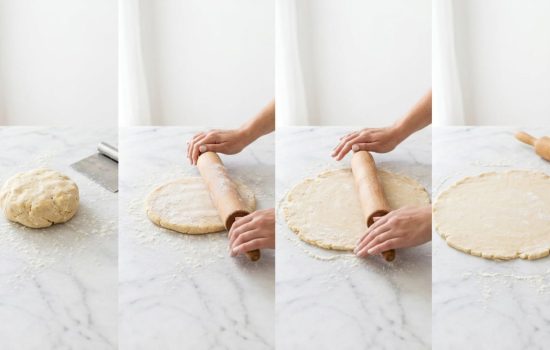
Rolling the dough
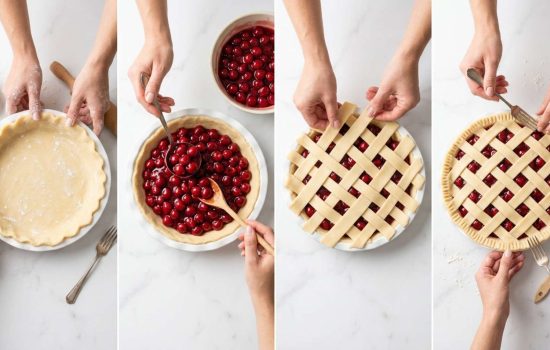
Roll out crust and assemble pie: bottom crust, fill, top crust or lattice. Active: 15–20 minutes.
Preparing the filling
Egg wash and bake until crust is golden and filling bubbles. Bake: 45–55 minutes.
Cool, slice, and serve
Cool to set the filling, then slice and serve. Cool time: 2 hours for best slices.
Timing notes make the process calmer. Keep your dough cold to avoid a tough crust. Use a rimmed baking sheet under the pie pan to catch any drips while baking. If the crust browns too fast, tent it with foil for the last 15 minutes.
This plan gives a fast map before the full cherry pie recipe details. Each step is simple and clear. The full recipe card below expands on techniques, tips, and exact measurements for an easy cherry pie recipe that becomes your go-to homemade cherry pie.
What You'll Need in the Kitchen
Creating a homemade cherry pie doesn’t need many tools. Most kitchens already have the basics. A few extra items make the process quicker and easier.
The Only Tools That Actually Matter
Focus on the essentials. These tools cover making a flaky pie crust and a fruit filling that bubbles.
No [Tool]? No Problem — Use This Instead
Don’t let missing a tool stop you. Practical swaps make baking easy for beginners.
- Wrap a clean wine bottle or water bottle in plastic to roll dough smoothly
- Use a food processor instead of a pastry cutter for fast butter work
- Mix butter into flour with two forks when no cutter or processor is available
- Press dough directly into the pie dish with a mason jar or a heavy pan when rolling is hard
These simple swaps make baking easier. They help busy cooks finish a cherry pie recipe without stress. And they still get a beautiful homemade pie crust for a warm homemade cherry pie.
Read This Before You Start Cooking
Before you start, do a quick check to avoid mistakes and save time. A little prep makes cooking an easy cherry pie recipe simple and stress-free. Make sure all ingredients are chilled, clear your workspace, and line a baking sheet with parchment paper.
The Mistakes Almost Every Beginner Makes
- Not keeping ingredients cold. Warm butter or butter bits that melt too soon make a tough crust instead of a flaky one.
- Overworking the dough. Kneading or rolling repeatedly compresses the layers and yields a dense crust.
- Skipping a thickener or misjudging filling liquid. Too little thickener or very juicy cherries lead to a runny slice.
- Forgetting vents or poor sealing. Steam needs a way out or the filling can bubble over and make a mess.
- Cut the pie right away. The filling needs time to set; slicing hot pie causes a soupy center.
How to Get Ahead and Save Time
- Make the crust a day ahead and keep it chilled, or freeze for up to two months. This speeds assembly and gives better texture.
- Pit and freeze cherries when they are in season. Kept in the freezer, they become the shortcut to a quick, flavorful fresh cherry pie any time.
- Use a food processor to cut butter into flour fast. It trims mixing time and keeps fat cold, ideal for a flaky homemade cherry pie crust.
- Preheat the oven fully and place a baking sheet underneath. That catches drips and prevents burned sugar on the oven floor.
- Assemble the chilled pie on parchment on a baking sheet. The sheet makes it easy to slide the pie into the oven without spills.
These small steps turn a rushed bake into a relaxed one. With practice, making a homemade cherry pie becomes not just doable, but a warm, repeatable ritual.
Something Went Wrong? Let's Fix It Right Now
Quick fixes are key to a great pie. This guide helps fix common issues fast. Follow these tips to rescue your cherry pie filling or improve the crust for the next slice.
Why Is It Too Dry, Too Wet, or Too Heavy?
Too dry filling often means overcooking the fruit or too much thickener. Add a splash of fruit juice or a light glaze to moisten and shine it up.
Runny filling? Reheat it on the stove. Mix 1–2 tablespoons cornstarch with cold water for a slurry. Add it, simmer until thick, then bake for 10 minutes to set. This trick can save your pie.
A heavy crust usually comes from overworking the dough. Serve it warm with vanilla ice cream or whipped cream to balance it. Next time, chill the dough and handle it gently for a flakier crust.
Why Didn't It Brown, Rise, or Cook Through?
Even browning needs steady heat and a clean oven. Low temperature or baked-on grime can stop it. Try baking it in a hotter oven for a quick finish, watching closely to avoid burning.
A cold center means underbaking or a dense filling. Cover crust edges with foil to prevent over-browning, then bake at 350°F until the filling bubbles and a thermometer near the center reads hot. Smaller pans bake more evenly next time.
It's Too Salty or Totally Bland — Here's the Fix
A salty crust can overpower the fruit. Serve it with unsweetened whipped cream or vanilla ice cream to balance the salt. Remember to use less salt in the dough next time.
Bland filling can be brightened quickly. Add a pinch more salt, a squeeze of lemon juice, or a drop of almond extract to enhance the flavor. These small changes can make your cherry pie delicious without overpowering the fruit.
The Texture Is Off — This Is Exactly Why
Gummy filling means too much thickener or overcooked starch. For future batches, reduce cornstarch or swap to instant tapioca for a clearer, fresher gel that better showcases cherries.
Soggy bottom crust points to underbaking or an overly wet filling. Blind-bake the bottom crust next time or brush it with lightly beaten egg white to seal it. This simple step keeps juices from soaking the dough and helps you serve the best cherry pie possible.
Get Fresh Recipes from Spoonista
Got Questions? Here's What You're Asking
What to Serve With Homemade Cherry Pie
Make a warm slice of homemade cherry pie unforgettable. These ideas are simple and delicious. They’re perfect for ending a weeknight dinner or being the star at a small gathering.
The best side dishes to serve alongside
Keep things easy with your pairings. Classic vanilla ice cream is a hit that melts into the filling.
Whipped cream adds a light touch and looks great with cinnamon. Greek yogurt brings a tang that cuts the sweetness.
- Coffee or black tea for a warm, bitter contrast
- Sparkling water with lemon to cleanse the palate
- A light dessert wine like Moscato for a special sip
Sauces & toppings that take it to the next level
Small touches can make a delicious cherry pie even better. A warm caramel drizzle pairs well with the tart fruit.
Chocolate sauce adds depth for chocolate fans. Crème fraîche gives a silky, slightly tangy finish that feels sophisticated.
- Sliced toasted almonds or toasted coconut for crunch
- Sprinkle flaky sea salt to highlight the cherries
- Pre-made caramel or chocolate makes assembly fast
How to turn it into a full table spread
Mix a few simple items to make the pie part of a dessert spread. Add buttery shortbread cookies and a fresh fruit salad for color.
A small cheese plate with Brie and aged cheddar pairs well with the fruit flavors. Set up make-ahead elements to save time when guests arrive.
- Pipe whipped cream into a bag and chill until service
- Pre-scoop ice cream into chilled bowls and keep covered
- Offer a hot coffee station with sugar, cinnamon, and cream
These serving ideas make any cherry pie recipe a thoughtful finale. Simple choices highlight the delicious cherry pie in casual family meals and relaxed entertaining alike.
Still Hungry? You'll Love These Too
Nice To Meet You !
I’m Everly Brooks and I ♡ wholesome vegan food. Food blogger and recipe creator—Spoonista is my passion, sharing budget-friendly vegan eats with you all!
Made this recipe? Tag @spoonista on Instagram—we’d love to see it!



 For the crust:
 Get Recipe Ingredients